Home » Chimney Sweep
Category Archives: Chimney Sweep
The Importance of Chimney Sweeps
Charleston Chimney Sweeps ensure the air you and your family breathe is safe and healthy by keeping chimneys clean. Their job is not an easy one though.
Early chimney sweeps used climbing boys (and girls) as their assistants. These children were reliant on the master sweep for employment, food and clothing.
A clean chimney protects a home from dangerous smoke and carbon monoxide leaks. It also promotes optimum heating performance, saving homeowners money on energy costs. In addition, sweeping keeps wood-burning fireplaces and stoves safe from fire hazards and creosote build-up. Chimney sweeps use a variety of tools to thoroughly clean the flue and surrounding structures, including wire brushes, a vacuum cleaner, tarps, and protective clothing to ensure that debris is not spread throughout the home.
Before a chimney sweep begins the cleaning process, he or she will lay down drop cloths to minimize soot and dust on furniture and flooring. In addition, the sweep will cover vents to prevent recirculation of soot and chemicals throughout the house. Sweeps will then use a tool that resembles a giant bottle brush to scrape away caked-on soot and creosote. After a thorough sweeping, the sweep will inspect the chimney for cracks and other signs of deterioration.
Many sweeps also utilize chemical cleaning products to break down hardened creosote deposits and make them easier to remove with brushes or scrapers. These chemicals are applied before the mechanical cleaning process, softening the deposit so that it is easily brushed or swept away. Professional chimney sweeps are trained to use these products safely and effectively, minimizing risks to both the sweep and the homeowner.
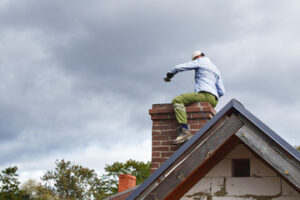
Chimney sweeping is a time-consuming process that requires a great deal of physical effort. As a result, sweeps need to be in good health and physically fit to perform the work. In order to prevent respiratory problems, such as asthma and emphysema, chimney sweeps wear face masks or respirators. Eye protection is also a must to prevent injury from flying ash or other debris. Sweeps will also use protective gloves to avoid cuts and burns while working with hazardous materials.
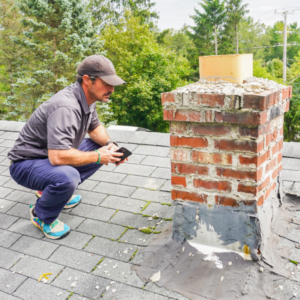
Chimney sweeps may also use an inspection camera to get a closer look at the inner walls of a chimney flue. The camera helps to identify potential problems that are difficult or impossible to spot with the naked eye, such as cracks or blockages. In addition, the chimney sweep can check for animal nests or other obstructions. These additional services are often included in the price of a basic chimney cleaning and can significantly improve a home’s safety and efficiency.
Safety
Chimney Sweeps have a long and storied history of saving homes from dangerous chimney fires. Today, they still play a vital role in home safety, cleaning and inspecting chimneys and providing valuable information that can help prevent deadly house fires.
A chimney is a structure that connects a fireplace or wood-burning stove to the outside environment. The primary purpose of a chimney is to allow the safe passage of smoke and dangerous combustion gasses out of the living areas. Chimneys are prone to blockages, creosote buildup, and other conditions that can affect their ability to vent. Regular sweepings remove soot, bird nests, cobwebs, and other debris from chimneys and can improve the efficiency of the fireplace or wood-burning stove.
Chimney sweeps perform detailed inspections of the chimney, flue pipes, and masonry. They follow NFPA211 inspection guidelines to assess the condition of the chimney. They also check for deteriorating chimney liners and structural problems, which can cause sparks or embers to escape the chimney and land on combustible materials in walls, attics, or roofs. Chimney sweeps can also detect faulty smoke detectors and other safety hazards within the chimney.
Sweeps use specialized tools to clean chimneys. These tools include flexible rotary brushes that reach hard-to-reach spots, high-powered vacuums that trap soot and other debris, and cameras that allow them to examine the interior of chimneys. These tools are designed to reduce the risk of chimney fires, which is the primary cause of residential fires.
Inhaling stirred-up soot can negatively impact a chimney sweep’s health. It contains many chemicals that can lead to lung cancer, mesothelioma, and other respiratory ailments. Chimney sweeps typically wear protective equipment and follow strict guidelines to avoid exposure.
Having your chimney and flue system inspected and cleaned regularly is one of the most important things you can do to protect your home from dangerous and costly chimney issues. Chimney fires, carbon monoxide poisoning, and other chimney issues can be devastating to your family. A CSIA Certified Chimney Sweep can help prevent these problems and save you money and time by ensuring that your chimney and flue pipes are functioning properly.
Maintenance
As chimney sweeps clean the inside of chimneys, they must wear a mask and protective eyewear to avoid breathing in soot dust. This may protect them from lung problems that could occur over a long period of time, including mesothelioma, asbestosis or another respiratory-related disease. Moreover, they must take the necessary precautions to ensure that they do not damage masonry or fireplaces when cleaning and inspecting.
Chimneys need to be free of creosote, a tar-like byproduct of wood burning that builds up on chimney walls over time. Regular sweeping removes the creosote, helping prevent dangerous chimney fires. It also clears the passage of dangerous combustion gasses and can improve chimney efficiency in some appliances.
Sweeps use rotary brushes and high-efficiency vacuum cleaners to clean the chimney. They start from the bottom up or top down and scrape off any accumulated creosote, soot or debris from chimney linings. The debris is then blown away by the vacuum or swept into a dustpan and removed from the home. Depending on the condition of the chimney, the sweep may also make minor repairs and address blockages.
Before a sweep arrives, homeowners should make sure the fireplace is accessible by moving any furniture or decorations. They should also place a drop cloth down to keep soot dust off surfaces and a shop vac on hand to decrease the amount of soot that is deposited throughout the house.
After a sweep is done, the homeowner should receive photographic or video evidence of any damage and an explanation of possible solutions. If a chimney is deteriorating, the sweep should also provide advice on how to prevent further issues in the future.
The chimney sweep profession has come a long way from the days of children being sent up chimney flues with brushes. Today’s professional chimney sweep is educated in the science of chimneys and fireplaces as well as building codes. They can maintain every type of chimney and venting system, as well as install new fireplaces and hearths. They can also perform Level 1 and Level 2 inspections with video equipment.
Environment
Besides keeping your home warm, the chimney system also provides a barrier against hazardous materials and toxic fumes. In order to prevent fire hazards, your fireplace and chimney must be regularly cleaned and inspected for any clogs. These clogs are often caused by soot, creosote, and other residues that accumulate on the inner walls of your fireplace and chimney. Chimney sweeps can identify and remove these materials to keep your home safe.
Before useful chimney sweeping tools were invented, child laborers were employed to climb the dangerous interior of the chimney. These children, known as climbing boys, were exposed to soot and creosote and experienced numerous health issues as a result of their job. The most notable was a form of scrotal cancer, first documented by English surgeon Percivall Pott in the 18th century. This was the first time that a specific occupational exposure led to a particular cancer.
The prevalence of chimney sweeps’ cancer led to legislative changes that improved worker safety and the treatment of children in this profession. The chimney sweeping industry also moved towards more sustainable cleaning methods, such as power sweeping. The use of power sweeping has reduced the amount of debris and waste produced during the cleaning process, making it more environmentally friendly.
Today, chimney sweeps still play a vital role in protecting homes from fire hazards. While gas and electricity have replaced coal as the main source of heat, many homeowners have chosen to maintain their fireplaces for aesthetic purposes and comfort. This is why regular chimney sweeping is so important. Chimney sweeps can inspect and clean your chimney to ensure that it is working properly to vent smoke, gases, and other harmful toxins outside.
Chimney sweeps are also responsible for reducing the environmental impact of your home’s heating system. By using biodegradable cleaners and sustainable sweeping methods, chimney sweeps help to reduce air pollution, greenhouse gases, and other pollutants in your neighborhood. These cleaners are also safer for your home’s lining and don’t contain any chemicals that could harm the environment or cause long-term damage to your fireplace.
Repairing Mortar Joints
Over time, exposure to rain and cold weather can degrade bricks and mortar. Any damage to masonry should be addressed right away. Failure to do so can lead to a leaning chimney that collapses.
Knowing what to look for can help homeowners spot problems early and get them repaired quickly. This article covers some of the most common chimney repair issues, from gaps in mortar to spalling. Contact Baltimore Chimney Repair now!
Mortar joints between bricks are one of the most vulnerable parts of a masonry wall or chimney. They can become damaged due to exposure to weather and moisture. Damaged mortar can lead to cracks, gaps, and crumbling of the masonry surface. It can also reduce the structural strength of the building or chimney. The best way to prevent further damage is by repairing damaged mortar joints as soon as possible.
Repairing old, damaged, or crumbling mortar is a process known as tuckpointing. The tuckpointing process involves chiseling out the old mortar and replacing it with fresh new mortar. While tuckpointing can be done by the homeowner, it is often best left to professionals. Professional masons are trained to evaluate and repair masonry structures, and have the proper tools for the job.
The first step in tuckpointing is to assess the mortar damage. Inspect the mortar joints for loose or crumbling bricks and for signs of water penetration or decay. A sledgehammer and cold chisel should be used to chip away the damaged mortar, while taking care not to damage the surrounding bricks. After the old mortar has been removed, a stiff brush should be used to clean the joint. Then, the joint should be lightly misted with water to dampen it. This step is important because dry brick sucks the moisture out of fresh mortar, preventing it from curing properly.
Next, prepare the new mortar mixture. Pour the ready-mix mortar into a bucket and add water gradually to achieve a consistency that is workable. Make sure to mix well and that there are no lumps. When the mortar has reached the right consistency, use a brick trowel to fill the old mortar joints. Start by filling the vertical mortar joints, then move on to the horizontal joints. Fill deep joints in layers, allowing each layer to set before adding more.
After the new mortar has been filled, let it set for about 24 hours. Then, use a flat tip screwdriver to “dress” the mortar joint to give it its final shape and match it to the existing color of the brick. Then, allow the mortar to set again for another 24 hours.
Brick Degradation
Brick walls and chimneys can become damaged by a wide range of factors. In some cases, deterioration can be so severe that the structure needs to be rebuilt. While some deterioration is inevitable, there are some steps that can be taken to limit the damage and extend the life of a brick wall.
Moisture is a leading cause of brick degradation. The material is porous and will absorb water over time, eventually becoming saturated. This saturation leads to damage, dampness, and discoloration. It’s important to inspect brickwork regularly for moisture issues and address them promptly.
Look for signs of water damage such as a white, dusty powder that appears on the surface of bricks. This is called efflorescence, and it’s caused by salt deposited on the brick from evaporated water. While this isn’t harmful, it can be unsightly and indicates a problem with the structure.
Other signs of moisture damage include cracks, buckling, and spalling. Cracks in brick are a sign of structural movement and may require underpinning or piering. Buckling and spalling are both indicative of water damage, and should be addressed immediately.
Keeping your building free of organic growth, including plants, will also help prevent moisture problems. These plants, such as ivy and other climbing vines, can block water flow and lead to leaks and dampness in the wall. If the plant isn’t removed, it can even lead to structural damage affecting the roof and walls.
Poor mortar consistency or coverage is another common reason for brick deterioration. In these cases, the bricks are more prone to damage and disintegration due to their inability to withstand abrasions or weathering. It’s crucial to work with a contractor who has masonry construction experience to ensure the mortar is applied correctly.
When repairing cracked or crumbling brick, mist the area with water before applying the new mortar to improve adhesion. Once the mortar is dry, use a tool to match the shape of the existing mortar joints and then use a technique known as feathering to blend the new and old mortar lines. Mist the repaired area daily for three days to ensure it remains moist and helps the mortar cure.
Leaks
Chimney leaks are often the result of a deteriorating chimney flashing. The flashing is the metal material that bridges the gap between a chimney and its roof, whether it’s made from shingles or another type of roofing. The flashing can deteriorate with age, or it can be damaged by harsh weather conditions like high winds and intense heat. The flashing should be properly layered with the shingle to protect against water penetration, and it should be adequately fastened with masonry screws or nails.
Depending on the severity of the chimney flashing damage, this can be a relatively easy repair for homeowners to make themselves. First, they’ll need to take a look at the problem from the ground to see where the water is coming in through the brick. Using a garden hose to soak a small section of the chimney can help a homeowner discover where the leak is coming from. A water test can also reveal if the leak is caused by a different issue, such as a failing masonry crown or cracked tuckpointing.
When a leak is found, the next step is to climb on the roof and look for the source of the leak. If the leak is from a flashing that’s damaged or not properly layered, this can easily be repaired with new roofing cement and masonry screws. Alternatively, a flashing replacement can be installed for more durable protection.
Some types of flashing deteriorate more quickly than others, so it’s important to check the condition of the flashing regularly. A qualified chimney service can replace the flashing and ensure it’s properly layered to protect against rain penetration.
Whether it’s a cracked tuckpointing or a leaky chimney, these issues can compromise the structural integrity of a fireplace and lead to costly repairs down the line. Homeowners should look for water stains, musty odors, or other signs of a chimney leak, and call a professional to perform repairs promptly to mitigate these problems before they get worse. This way, homeowners can enjoy the warmth and ambience of their chimney again without worrying about the safety or integrity of their home’s masonry.
Rust
When you see rust in your chimney, it’s a sign that it needs some attention. Chimney rust isn’t just unsightly, it can also be dangerous. It can damage the inside of the flue, which could lead to chimney fires. Rust can also cause the chimney to leak. Chimney rust can be repaired in several ways, including by repointing or tuckpointing. Repointing is the process of repairing the mortar joints, while tuckpointing involves filling in and patching the bricks to give them a more polished appearance. Both methods can help to reduce leaking and increase the efficiency of your chimney.
When your chimney is leaking, it can cause serious damage to your home and its structure. It’s important to keep up with your chimney maintenance and hire a professional chimney repair contractor when needed.
Another common chimney problem is carbon monoxide leaks. Carbon monoxide is a poisonous gas that can build up in your house if it isn’t vented properly. Carbon monoxide can also enter your home through damaged chimneys, causing severe health problems for your family.
While masonry chimneys are built to be incredibly durable, they can still suffer from structural problems from time to time. Cracks in the crown or spalling bricks can be a big problem for homeowners, but fortunately, these issues are easy to fix. A professional chimney repair contractor can use a special cement to repair these issues and restore the integrity of your chimney.
Chimneys with cracked or crumbling bricks should be repaired as soon as possible. These issues can lead to expensive repairs, or worse, they can put the safety of your home and family at risk. Chimney bricks can crumble for many reasons, including harsh weather conditions and the type of mortar used during construction.
If you notice cracks in your chimney, it’s important to get them repaired right away. A professional chimney repair technician can seal these cracks using a special cement, which creates a watertight barrier to prevent further damage. Chimneys with larger cracks may need repointing or relining. Relining is a more extensive repair option, but it’s often necessary if the chimney flue is damaged or shows signs of leaks.